In Stock
We are in the final stages of finalizing our eCommerce solution. Pricing and online ordering will be available before September 1. If you want to place an order please give us a call at (361) 254-1427
$234.00
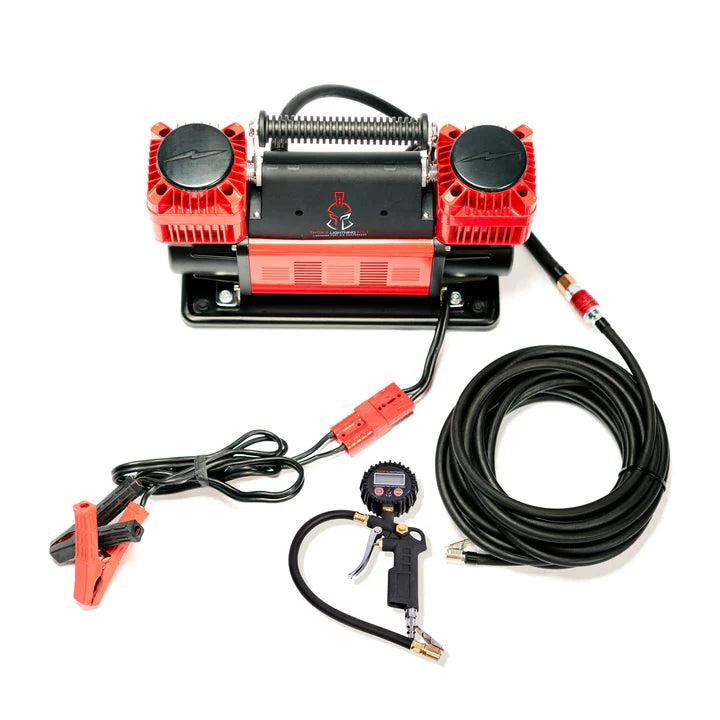
Thor’s Lightning Bolt Portable 12v True Dual Air Compressor is the ultimate air solution. Lightning Fast, adding 20 lbs. of pressure to all tires in 4 minutes. Portable with battery clamps, Quick Disconnect Wiring Harness, and equipped with a Digital Tire Pressure Gauge. Adventure-ready with a heavy-duty nylon carrying bag and impact-resistant caps. Backed by a 5-year warranty. Be an Air Hero on the trail with Thor’s Lightning Bolt!
What makes the Thor’s Lightning Bolt Portable 12v True Dual Air Compressor 10.6 CFM so Great? We view air management as Mission Critical Gear. That’s why the Thor’s Lightning Bolt True Dual Air Compressor is the ultimate 12v portable air source. This dual air compressor has a flow rate of 10.6 Cubic Feet Per Minute (CFM), which makes it one of the fastest air compressors on the market. What sets the Thor’s Lightning Bolt apart from the competition is simple: flexibility.
The Thor’s Lightning Bolt is truly Lightning Fast- it can add 20 lbs. of pressure to all four tires in about 4 minutes (depending on tire size and pressure) using the Thor’s Lightning Rapid Multi-Tire Air System (sold separately). The compressor comes with battery clamps to be attached to the positive and negative battery terminals, making it portable. With the purchase of the Quick Disconnect Wiring Harness, you can easily hardwire the Thor’s Lightning Bolt into your vehicle!
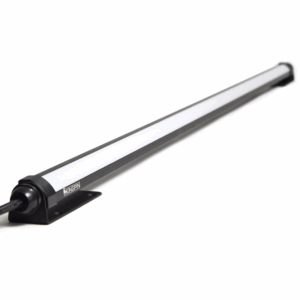
The Thor’s Lightning Bolt True Dual 12v Portable Air Compressor includes the Thor’s Lightning Digital Tire Pressure Gauge as a standard accessory! No more screw-on chucks and walking back and forth to turn the compressor on and off to get a tire pressure reading like other compressors on the market. Instead, we include the Thor’s Lightning Digital Tire Pressure Gauge that allows you to check the pressure quickly and easily right at the tire. Made out of high-grade and lightweight aluminum, the Thor’s Lightning Digital Tire Pressure Gauge is built with adventure in mind. Another bonus- it works great as a single tire inflator and for filling bicycle tires, pool inflatables, or anything else you want to inflate using the Lightning Bolt True Dual Air Compressor!
The Thor’s Lightning Bolt also includes a Thor’s Lightning heavy-duty nylon carrying bag complete with a heavy duty zipper. We recognize life can be rough- so we use impact resistant heavy-duty composite threaded air cylinder caps to make sure the Thor’s Lightning Bolt True Dual Air Compressor is ready for wherever your adventure finds you- and to make maintenance easy with access to the washable air filter elements on top of the cylinders.
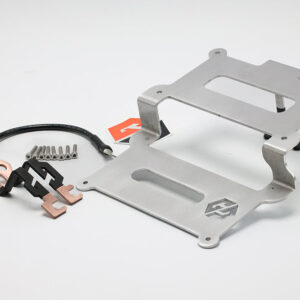
The Thor’s Lightning Bolt True Dual 12v Portable Air Compressor will work out of the box with Thor’s Lightning Rapid Multi-Tire Air Systems and is directly compatible with the Refuge MOLLE Air Compressor Mount. The Thor’s Lightning Bolt True Dual Air Compressor is equipped standard with an 80-120 PSI Pressure Switch for air tank applications and use with air tools. Our portable air compressor is also outfitted with standard I/M fittings for maximum flexibility with tools and tanks- no adapters needed. The compressor also comes with attachments for inflatables, bicycle tires, and sports equipment. The standard Heavy Duty 80-120PSI internal pressure switch makes the Thor’s Lightning Bolt a perfect option for running an air tank.
We stand behind our gear- which is why our air compressors include a 5-year warranty against manufacturer defects- because we know quality is invaluable to the Mission. Be an Air Hero out on the trail today!
Deflation:
Inflation:
NOTE: If utilizing a compressed CO2 air source (Power Tank), it is recommended not to exceed 200 p.s.i. in pressure on the regulator to prevent leakage unless a 250 p.s.i. High Pressure gauge upgrade was purchased.
If the digital gauge appears to be reading high or low, recalibrate the gauge by removing and re-installing the AAA batteries inside of the gauge. If that doesn’t work, the gauge can be recalibrated using the following procedure:
1. When the pressure gauge is in the state of no air pressure, remove the battery and then re-install the battery.
2. Press and hold both of the two buttons (ON and UNITS) at the same time for about 5 seconds until the display shows “-80”.
3. When -80 appears, inflate the pressure gauge to 80psi: do not add air pressure slowly, it needs to be added to 80PSI quickly.
4. If the display show “pass”, the pressure gauge is recalibrated successfully.
5. Then remove and re-install batteries in pressure gauge, which will be ready for use.
Thor’s Lightning TotalControl Hammer Manifold (TCHAM001) Instructions:
Tip: Further Deflation:
To deflate further, with the hoses connected and the manual valve open, press “-” to lower the PSI. The controller will automatically continue deflation until the new pressure is reached.
Re-calibration procedure:
Local atmosphere pressure will be recorded as 0, and unit will be re-calibrated to local conditions.
Tip: Inflating higher pressure for rear tires than front:
Thor’s Lightning Quick Disconnect Kit (QDK001) Instructions:
Step 1: Disconnect positive battery terminal from vehicle battery.
Step 2: Cut alligator clips off of Thor’s Lightning Bolt True Dual Compressor wires (take note of which wire is positive and negative with use of tape).
Step 3: Feed red (positive) wire and black (negative) wire from Hardwiring Kit to vehicle battery or attachment to body (rear cargo area floor, battery terminals, etc.). DO NOT ATTACH WIRES TO BATTERY.
Step 4: Strip insulation of red (positive) wire approximately 1/2” using wire strippers. Strip positive wire of compressor (marked with tape) approximately 1/2”.
Step 5: Twist uncovered wire into a strand on both red (positive) wire and the air compressor wire. Place black heat shrink on both wires near end. Crimp on pole-connector terminal to both ends of wire. Use heat shrink as necessary to ensure protection from the elements.
Step 6: Connect power pole wire connectors using “+” (positive) side to pole-connector terminals on both the compressor and the wiring kit positive wires. Repeat steps 4-6 for negative wires from wiring kit and compressor.
Step 7: Cut red (positive) wire in engine bay near fuse box with wire cutters. Strip approximately 1/2” of insulation from both ends of red (positive) wire using wire strippers. Twist exposed wire into a strand. Unscrew plastic end caps of provided 100 Amp Fuse Receptacle Place and slide them over ends of wire onto insulation. Place wire in provided 100 Amp Fuse Receptacle and screw down terminals tightly onto exposed wire. Screw plastic end caps back onto fuse block. Use heat shrink if necessary before placing wire into fuse holder.
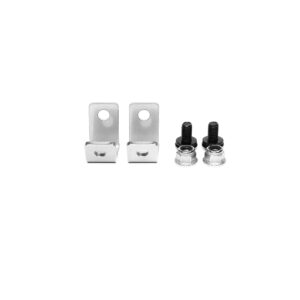
Step 8: Strip approximately 1/2” from end of red (positive) wire near battery terminal. Place black heat shrink over end of wire. Twist exposed wire into strand. Place wire into provided silver wire terminal. Crimp wire into terminal firmly using wire crimpers. Place heat shrink over terminal connection and shrink it into place to protect against the elements. Repeat for black (negative) wire.
Step 9: Determine where to best place fuse holder in engine bay (side of fusebox) and screw fuse holder into place with small screws.
Step 10: Carefully place terminal onto positive battery terminal and bolt it onto terminal.
Step 11: Turn vehicle on and test the Thor’s Lightning Bolt True Dual Compressor by using power switch on top of compressor.
Step 12: Show all your friends how fast you can air up!